Showing posts with label Beauty. Show all posts

Thursday, 13 October 2016

My Miss Great Britain Experience - Miss Bedfordshire 2016

My Miss Great Britain experience

So apologies for the total lack of blogging in the past few months, if you follow my social media accounts you will have probably seen that in the last few months I have been completely absorbed in the Miss Great Britain competition and the beauty pageant world. It’s safe to say after my first experience earlier this year (see Miss Essex post for details) I have become completely entranced by all things beauty pageants and as I got such a great response from my first post and have people ask me on a daily basis about Miss GB I thought I would share!

Winning a title in the Miss GB pageant came as a total shock to me, I had applied following my first pageant experience but never thought I would get anywhere and to my surprise I managed to win a title and be crowned ‘Miss Bedfordshire’ ..Why Bedfordshire you ask? One thing I must clear up is that although I live in Essex, at the time I had strong links to Bedfordshire in my work and social life as well as living within a 50 mile radius. I had also applied for the Essex title but placed as a runner up, but to a total sweetheart so I didn’t mind!

The lead up to the actual competition, held on the 22/23rd of September, felt like an eternity. We did have a number of optional ‘pre’ competition rounds of charity, beach body, talent etc etc, all of which I got involved in as much as possible and kept me busy during the lead up to the big day. As well as these round I also had the huge job of finding THE dress ..which the more I type the more I realise I’m starting to sound like I’m preparing for a wedding not a pageant.

After the longest wait in the history of ever (okay maybe not but 4 months is a long time when you’re that excited for something) and god knows how much spent on dresses, shows, makeup and so on, it was finally time to make the trip up to Leicester for the final, where everyone’s hard work would finally reach the dramatic crescendo we had all been impatiently waiting for.

The first ‘official’ day of the final consisted of rehearsals, a judge’s interview, pizza and press calls, culminating in a fab dinner and disco at a local Indian restaurant and bar called Chutney Ivy, where me and Miss Cambridge, who is a total babe BTW, decided to get smashed on wine and then work off our guilt in the hotel gym at 11pm, as you do…

The second day, also the day of the main event (!!!) was even more of a whirlwind of breakfast, photos, rehearsals, hair, make up, heels and ridiculously expensive dresses. We spent the morning practicing our routines to within an inch of our lives, no one wants to be the girl that forgets her routine on stage ..or worse ..falls of the stage! At around 4pm, (I think4 pm, to be honest by this point everyone was so high on nerves and adrenaline we barely knew what our own names were) we were finally allowed to get ready! The pressure was on to get everything in order and looking perfect ready for the show to start at 7:30 ..3 and a half hours sounds like a lot of time to get ready but when you’re about as calm as a headless chicken this seems like 3 minutes.

3 or so hours passed and finally all 49 finalists had transformed into beautiful queens, any of which could take the crown and the prestigious title of Miss Great Britain 2016.

After months and months of waiting we were finally here, the Grand Final. Now I’m not normally a nervous person but standing backstage my nerves hit me like a train, after years of dances shows, horse competitions and job interviews as well as previously taking part in regional pageants I had almost forgotten what nerves were, but there I was ..standing backstage at one of the biggest and oldest beauty pageants in the country with my spray tanned legs shaking in my sky high pageant heels. But there was no time to think about that now, it was time for us all to parade on to the stage and smash (try to anyway) the opening dance routine we had been furiously practicing for weeks before the final thanks to the videos one of the organisers and the choreographer posted on Facebook for the world to see, honestly the pair of them deserve a medal for that alone.

The first dance was a blur of arms, hair and girls in black dresses if I’m honest, most of it I was praying my sash didn’t fall down my arm and that I remembered the whole routine, which I did, perfect timing if I say so myself! All too quickly the opening was over and it was time for our black dress round, a fairly simple routine of parading down the catwalk in a groups of 10 then again one by one ..sounds simple right? ..Not when your legs turn to jelly and your brain decides to go to sleep!

From the floor and the audience the stage looked like your average, relatively small catwalk but when you’re up there it’s a totally different ball game ..a huge white glossy stage with all eyes on you. I won’t lie although it was slightly terrifying I loved every minute of being on stage and couldn’t wait to get to the next round ..swimwear!

I get a lot of question about swimwear rounds, some people think it’s quite old fashioned but when they don’t realise is that it’s not just about what your body looks like these days, there is so much more to it. Judges want to see you looking confident and proud of yourself, whatever size or shape you may be , not that you’ve been starving yourself for weeks!

I’ll admit I was nervous for this round as it’s the first time I’ve ever done a swimwear round and while many other girls where ‘clean eating’ I was eating pizza (generously provided by Leicester Dominos ..Total babes!)I was trying to think ‘Victoria secret Model’ while on the runway but honestly I think it ended up more Victoria sponge cake ..oops!  I don’t think I did too badly ..again I was nervous which let me down massively but these things happen right?

So swimwear was over ..time to get into our evening gowns! I went back up to our dressing room prepared to get into my massive dress and to my horror someone had stolen my underwear.. WHO STEALS SOMEONE’S UNDERWEAR? I 100% know it was on the top of my bag when I left the dressing room and gone when I came back. Maybe some people are into that kind of thing who knows?

Anyway, knickers or no knickers I was going to have to parade down that catwalk in less than 5 minutes time, so I forgot my troubles, donned my enormous dress and made my way backstage. This was it ..final chance to impress the judges. With a dress weighing what felt like the same as a small car and a train as long the list of things I have to do this weekend, I was going to sashay my little booty off and sashay I did! Without me or my dress falling off the stage which, you know, is always a bonus. Don’t get me wrong though, it’s quite hard to concentrate on your walk or pose when all you can think about is the fact you are completely commando…
Unfortunately I didn’t place in the top 15 but honestly after the nerves and it being my first national pageant I really didn’t expect to, I was so happy just to be there and meet all of the others girls. In the end an absolute beauty won the title, a real life Disney princess with heart of gold who deserved that crown and will do Miss Great Britain proud!

It was honestly the most stressful but most amazing 2 days of my life and I hope to be lucky enough to compete next year.

There are so many people I want to thank for everything they have done for me in the build-up and during the final.

First of all a massive thank you Kate, Jemma and the ModelZed team for putting on a fantastic competition, for such a small team they do an amazing job!

I would also like to thank my sponsor Keen Shay Keen Accountancy in Bedford and especially Charles for believing in me and sponsoring my journey. This brilliant company have been so supportive and so motivating during the build-up. I appreciate the support so much
I have to thank my wonderful family and friends for being so so supportive during the build-up, during the final and after. Thank you for putting up with my constant Miss GB talk, voting pleas and helping with my charity events. Shout out to my dad who has now become a fully-fledged pageant dad ..Toddlers and Tiaras would be proud!

I also want to thank everyone who has supported me on social media, I have had so many beautiful and inspirational messages from people I don’t even know and it does mean so much!
Last but not least I want to thank all of the lovely judges and of course Red Carpet Ready for supplying my gorgeous evening gown!

The pageant bug has no signs of stopping so I’m off to look for my next pageant venture…

Until next time…
Essex Beauty Queen xxx


Thursday, 30 April 2015

Oxford Street Lush Haul!


So after a morning of excitement at the My Chocolate Bloggers event myself, Charlotte (with love, Lottie) Hannah (hannahtalks) and Hayley (the Glasgow Girl) decided to brave a London bus to Oxford Street and the newly opened Lush store!

I am a total sucker for anything Lush so you can understand why I would be so excited to go to the worlds biggest Lush store!

Like most Lush stores you can smell them before you see them and Oxford Street was no exception!
The new store features 3 floors of dreamy Lush products, some of which are exclusive to the Oxford Store and there's even a spa in the basement! What more could a girl ask for?

I decided to treat myself to some old favourites and some new beauties.

My fav picks were:

Think Pink - my trusty favourite and a gorgeous smelling bath bomb!

A French Kiss Bubble Bar - I love anything that is lavender scented and I hadn't discovered this one until my recent Lush trip ..I was so on love I bought 2! Lavender is perfect for when you're feeling a little stressed or finding it hard to sleep, it really is my go to for all of those long days!

Sunny Side Bubble Bar - this little beauty caught my eye is it's COVERED in gold glitter!! It also smells amazingly fruity making it perfect for summer!

MMMelting Marshmallow Moment Bubble Bar - this is also one of my favs I previously bought at the Lakeside store so I couldn't resist this little pink bar of floral bubbly-ness!

Now all that's left to decide ..is which to use first!

Monday, 6 April 2015

Mermaid stencil nails


Recently I seem to have developed an uncontrollable love for all things mermaid!

Mermaid hair, mermaid nails ..literally everything!

I had seen some really pretty mermaid nails on Instagram and decided to have a go myself.

I chose to use stencils from a company called Nail Mail rather than try and paint on the scales myself with a metallic gold base coat and different shades of purples (including some glitter of course.

I painted my nails with one coat of the metallic gold (Barry M) the painted a clear coat over the top then left to dry for 15 minutes - this step is essential to stop the stencil pulling off the base coat later on.

I then applied the stencil to all nails on one hand (it helps if you have quite narrow nails to cute the stencil in half that way you have less waste meaning you have stencil left over for next time!) I decided to leave a feature nail plain gold.

I used 4 different purple shades over the stencils - Barry M purple glitter, China glaze in a dark pink shade and lilac shade and OPI in Significant Other Colour. I used a small sponge and tweezers to dab on each colour to give a slight mottled effect rather than just using on solid colour.

I found it is better to do one nail at a time then peel the stencil off straight away while the paint it is still wet to avoid the paint drying and the stencil pulling off some of the paint potentially ruining the effect.

Finish with a nice shiny clear top coat and voila ..perfect mermaid nails!

You can use literally any combination of colours to create this effect, the possibilities really are endless!

Stencils - £3.95 from Nail Mail
Midi rings - £3 for set of 3 Primark


Friday, 3 April 2015

Younique 3D fibre mascara - does it actually work?


Does the Younique 3D fibre mascara actually work? That is the question everyone is asking - I have shared my experience with the product to help answer this question and any other questions you may have....

Anyone that has read my Trich post from a few months back will know that getting amazingly long and thick lashes is a bit of a challenge for me.

I'm happy to say that over the past month or so my Trich has died down and allowed me to grow my eyelashes back but they are still short and a long way off the huge, fluttering eyelashes I would love.

So I did some research on different mascaras/serums that would give me the results I longed for but many of them were pricey with no proven results. I started wearing false eyelashes every day in hopes that my eyelashes would look normal again but let's be honest putting fake eyelashes on every morning for work when you're still half asleep is no easy task so one day when I was scrolling though twitter I had seen the Younique 3D fibrelash mascara and thought I would give it a go!

At first I found it hard to get find honest reviews of the product as everyone who was posting reviews turned out to be a Younique presenter! So I thought to help other girls out there like me or just anyone wanting to try the product in general I would write an honest review.

The product features two different tubes in a cute little case - one is the tiny black fibres used to add length to lashes and black glue used for sticking fibres to the lashes.
First of all can I just make it clear that at first creating amazingly long lashes is not as easy as it's made out to be, this really is a case of practice makes perfect but doesn't mean it can't be done!
The black glue applicator looks like and can be applied like a normal mascara then the little fluffy fibres are brushed onto the glued lashes - here are some useful tips for getting perfect luscious lashes:

- The glue dries extremely quickly so ensure you have the fibres tube already unscrewed and ready to use as soon as you have applied glue, this also helps avoid clumps.

- Trying to glue/brush on fibres to your all of your lashes on one eye can be messy and create clumpy lashes that are stuck together. Work on a few eyelashes at a time to keep lashes separated and looking longer.

- Once a row on lashes has been glued and the fibres added apply a layer of mascara, even if you're planning on adding another layer, to prevent rogue fibres falling into your eyes - they are extremely irritating and almost impossible to get out!

- When applying mascara wait at least 2 minutes to make sure the glue and fibres are dry to stop the mascara pulling the fibres back off. Apply mascara lightly to ensure fibres aren't pulled off or moved.

- Use tweezers to delicately separate any lashes stuck together. Do this while the glue is still relatively wet.

- When filling in areas with shorter lashes (I have to do this a lot) focus on those areas first until they reach the length of the normal lashes then start to apply the glue/fibres in sections as normal.

- To achieve the best results I personally use at least 2/3 coats of glue/fibres/mascara (in that order) for beautifully long lashes. I find any more that this can cause lashes to touch under my brows and cause the lashes to bend.

- Have patience! It may seem a tad difficult at first but it does get easier with every use!

Over all once I had practised the art if applying the 3D mascara I am happy to say it's not an over hyped product that fails to deliver and that it REALLY DOES WORK! I will definitely continue to use this product in the future and would recommend to any girl looking to achieve long, natural looking lashes.

I hope I have been able to answer your questions about the 3D mascara but if you have any other questions please don't hesitate to ask :)

Thanks for reading xx

Sunday, 29 March 2015

Nude is the new black...


So I'm usually totally against plain boring nails but as spring is now in session I thought it was time to try something new!

I'm totally into nude/pastel shades right now and thought I would spread the love to my nails.

I chose a beautifully subtle nude shade from China Glaze called Faith and I'm happy to say it did not disappoint!

2 coats gave a gorgeous natural look and made my nails look super healthy too. I also so added a coat of clear topcoat for that added shine!

I think it's safe to say I may have been converted to plain nails after all ..for now anyway!

Thanks for reading xx

For anyone that wants to purchase this colour I bought it on eBay for £4.95 just search China Glaze 'Faith'

Wednesday, 4 March 2015

How to: Easy Mermaid Ombré Nails


First I must apologise for neglecting my blog and breaking my new years resolution to post more often! I have been super busy with everything including celebrating my 22nd birthday ..old I know!

Anyway, as you may know having pretty nails is a must for me and I'm always looking for new things to try out - this time I've braved ombre nails!

Ombre nails are easier than you may think, all you really need is a flat, small sponge, 2-3 different colour nail varnishes, a clear top coat and nail varnish remover for if things get messy. I chose to use a triangle make up sponge (the cheap ones you can get from Superdrug). The pink shade is China Glaze Something Sweet, the lilac shade is China Glaze In A Lily Bit and the blue is from Primark's P.S beauty range. I also added OPI Significant Other Colour mixed with a little bit of clear topcoat to give the nails a mermaid-y shimmer as I love anything mermaid related!

So to create these ombre mermaid nails make sure your nails are free of any other nail varnish and are clean and dry. Apply a clear base coat followed by a coat of Something Sweet over the whole nail to brighten the other colours when applied as it is the lightest colour.
Brush a small amount of each colour onto the sponge (as shown in the picture) and quickly dab across each nail until the paint will no longer transfer as it is dry, wait for this layer to partially dry and repeat the process of painting a strip of each colour onto the sponge and dab onto each nail until the desired colour is reached. Once you are totally happy with the colour add a little topcoat to give your nails a bit of protection and some extra shine! Alternatively you can also use a matte topcoat for a bold,chalky effect.


When dabbing the colour onto each nail ensure you don't put to much pressure on to the sponge, as if the paint is still wet it may remove paint that is already on the nail. Also make sure your not dabbing the same part of the sponge on to the same part of the nail each time as the nail may look more stripy than gradient . Obviously the ombre technique takes a bit of perfecting with trial and error to perfect, but experimenting is part of the fun.

Creating ombre nails can be a little messy when using a sponge, to get to the very edge of each nail you are bound to get some paint on your fingers, this can easily be removed with a cotton bud and nail varnish remover for a flawless finish.

There are so many colour combinations that can be used for ombre designs, the possibilities really are endless.

I hope this has given you guys a little help with creating your own ombre styles!

China Glaze Something Sweet & In A Lily Bit: Both £5.75 from eBay
PS Blue Nail Paint: £1 from Primark
OPI Significant Other Colour: £6 from a wholesaler but can be found on eBay and Amazon
  

Saturday, 3 January 2015

'New Year, New Nails...'

'New Year, New Nails...'


As Zooey Deschanel once said - 'I don't like plain nails, I get sad.'  And she couldn't be be right!

All you dolls (and guys) may have noticed pretty nails are VERY important to me.

Because of my December blog posting failure and being super busy I never got the chance to share my Christmas claws with you all so instead I want to share my latest set of talons and my new nail fav nail paint.

In keeping with my love for matte nail colours I finally treated myself to the Barry M black matte paint and the Nails Inc matte top coat ..both of which lived up to my high expectations!

My latest nails are a mix of Barry M, OPI and Nails Inc. The Gold glittery goodness feature nail is two coats of OPI Nicole 'Glitter in my Stocking' with the rest of the nails painted with 2 coats of Barry M Matte Black nail paint and one top coat of Nails Inc clear Matte top coat. The nails were finished off with a few gold gems to add some extra sparkle!

Barry M Matte black nail paint - £3.99 from Superdrug
Nails Inc Matte top coat - £12 from House of Fraser
OPI Nicole Glitter in my stocking - unfortunately I bought this bottle of gold loveliness a few years back (and it's still going!) but I don't think it's available in stores anymore but OPI have plenty of other gorgeous golds on sale!
Gold gems - £0.99 from eBay

Friday, 2 January 2015

My New Years Resolutions 2015

My New Years Resolutions 2015

So I never normally do the whole 'Resolutions' thing as all I ever seem to see is other people fail with theirs but after having not the best of years in 2014 I thought maybe it would give me some positivity and something to aim for!

After thinking about this for a good few days I have decided on 2 ..enough to keep me occupied but not too many that I lose the will to live!

My first resolution is to blog more! Having been an absolute fail on the amount of blog posts I've done in December (I only posted twice the whole month) and never posting as regularly as I would like to I have made this my number one resolution and I intend to stick to it as I have 10000 things to blog about! (Not literally but it feels that way)

My second resolution is to get fit. I know literally everyone says this every New Years and it gets very boring very quickly with 99% of these people are pigging out on McD's in front of the TV after two days as they have no motivation.
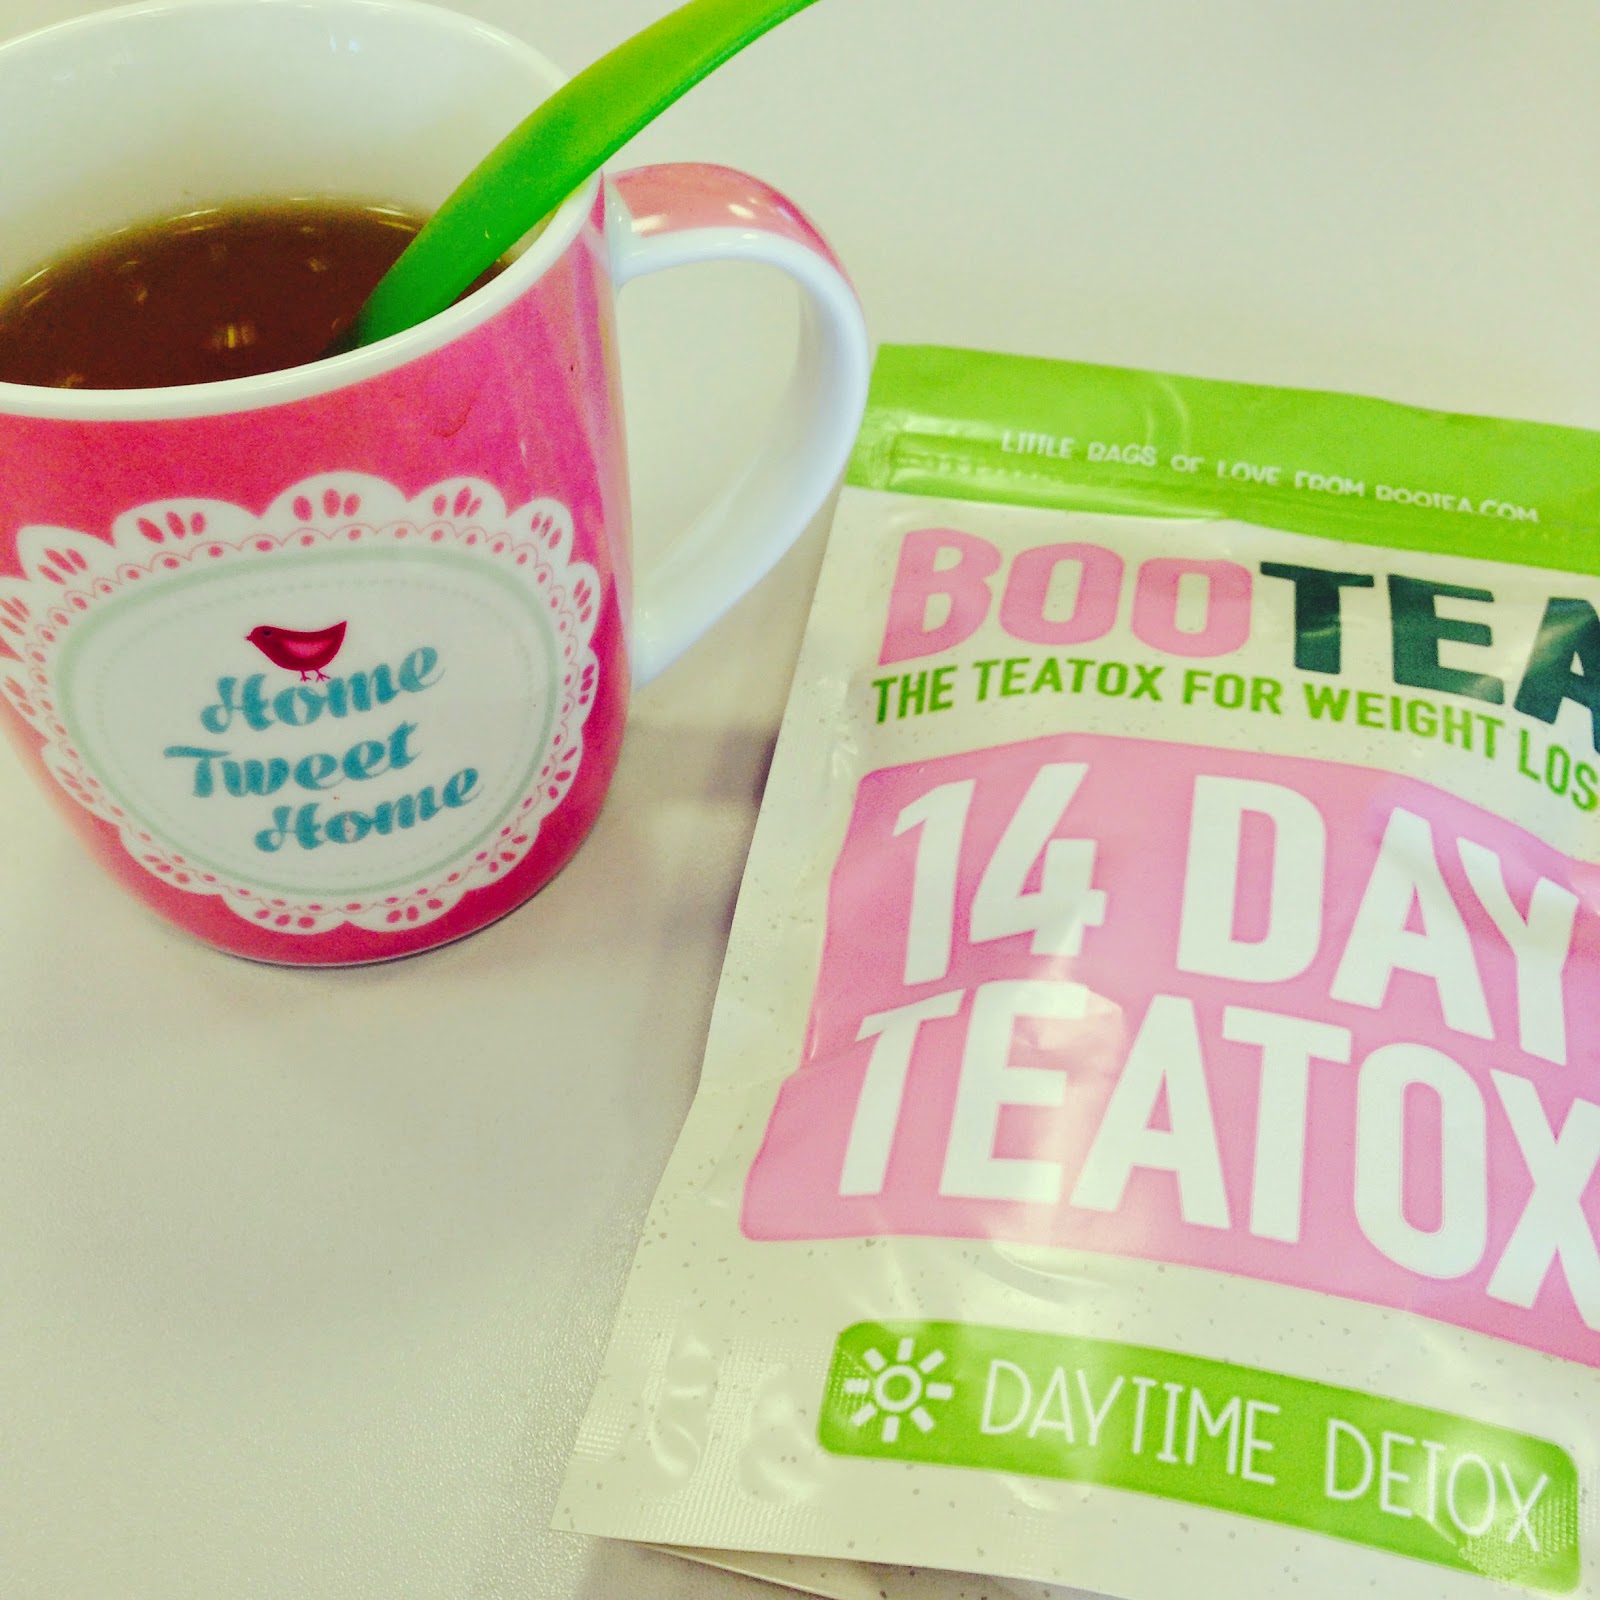
I have wanted to take up healthy eating and regular gym trips for over a month now but let's be honest ..Christmas is the worst time to do this! With constant parties, dinners and work do's it's near impossible to keep to a clean diet and find the time to exercise, so what better time to start than New Years! I will also be back on the Bootea weight loss teas as these were such a big success for me the first time! (Please see previous posts for details!)

I will post updates on my fitness challenge alongside my second Bootea experience and of course keep the blog posts on beauty and fashion coming too!

Wish me luck!


Saturday, 29 November 2014

Scandaleyes VS Trichotillomania

Over the last few weeks I have been majorly slacking on the blog posts, I know, I can only apologise and promise to be more active! 😘

So I wanted it post about an issue that's close to home for me and see if there are any other girls out there that suffer with this too. Even the most calm people can suffer from stress sometimes and of course, everyone has their own ways of dealing with it ..unfortunately mine happens to be a confidence killer called Trichotillomania.

Trichotillomania is a condition where a person has the overwhelming urge to pull out their hair, whether it be the hair on their head, eyebrows, eyelashes or pretty much any other area, the impulsive feeling to pull just builds tension until you give in to it.
My weakness happens to be my eyelashes, as I have practically no eyebrows (the joys of being blonde) and I have micro loop extensions which just about stops me pulling my hair out, and often even when I am only the slightest bit stressed I begin to tear my eyelashes out, sometimes without even realising, especially when I am asleep.

Can you imagine? Waking up with no eyelashes on one eye? Even the thought can be scary let alone the reality of it.

There are people out there who believe 'it's not even a big deal?' But thinking about it when you talk to people face to face eye contact is everything and knowing you have a naked eye can really affect how you communicate, constantly worrying if they can 'see how odd your eyes are'.

I was told by my doctor there isn't a necessary cure as all cases are different so I have to just manage it as it comes, there is no stopping it but I have found ways to hide the damage done until the eyelashes grow back again.

With a mixture of mascara, eyeliner and false eye lashes, feeling better about my condition has gotten easier, although nothing compares the real thing I don't have to worry about my eyes bald patches!

When stress kicks in and the pulling Starts I tend to aim for certain sections of eyelashes (subconsciously of course) where hiding the gaps can be difficult, usually from the corners to the middle where gaps become quite obvious, but for any of you girls suffering with this too all is not lost! I have found some beauty tricks that can hide any unwanted gaps and help you face the world without having to feel self conscious!

Depending on the size of a gap in my eyelashes I use a thick, dark mascara to almost fill in the gaps if they aren't too bad, I find volume sing mascara works best for this and my new favourite is the Rimmel Scandaleyes Retro Glam extreme black mascara - although this is the product I would recommend it is thick and can clump easily so keep a thin mascara brush on hand to brush away all those clumps! Spider lashes are so 5 years ago...
For added lash gap camouflage add a thin line of eyeliner on your eyelid along you lash line - my favourite is the Scandaleyes wanted proof micro liner in black.

When gaps aren't as easy to disguise the best option is false eyelashes. A daunting idea for anyone not familiar or comfortable with wearing them. My advice would be to start small, possibly using Eylure glue on lashes in number 050. These are tiny, light weight and so easy to apply, perfect for any beginners or novice lash lovers. My personal favourites are Eylure number 116 lashes as these are super long and add volume while hiding those god awful gaps! These can be worn all day comfortably and usually will last all day without needing to reapply. Applying any eyelashes can be tricky at first but as the old saying goes ..practice makes perfect!

For my fellow Trichotillomaniacs (I don't even know if that's a word?) who experience this with their eyebrows, there so many products available now days for filling and drawing on eyebrows, that camouflaging any gaps you may have is easier than ever, from powder kits to pencils and stencils (pun not intended).

I would recommend the retractable sleek eyebrow pencil to anyone, whether you're a beginner or expert when it comes to eyebrows as it super easy to use, it has a thin tip making precise shaping simple and comes in all shades, even blonde!

Scandaleyes Retro Glam Black mascara: £6.99 Superdrug
Scandaleyes black waterproof micro liner: £5.49 Superdrug
Eylure lashes: £5 Superdrug
Sleek eyebrow pencil: £5.99 Superdrug

Hopefully this helps some of you other ladies suffering from this. Comments always appreciated 💌

Wednesday, 26 November 2014

Pretty in pink.. Boohoo style!

So first of all I would like to apologise for the lack of posts recently ..sometimes life catches up with you all at once but I'm back in the game and what better way to cheer a girl up than a delivery from the fabulous Boohoo.com!

Over the festive season sometimes it can feel like you need to buy 100 dresses for all of the dinners, parties, work do's and more! With all your money usually being spent on Christmas presents and cheesy jumpers where will you find the time and money to find some killer outfits that won't cost the earth? Boohoo duh!

My most recent purchase was a beautiful cerise pink off the shoulder dress in a simple yet sassy style! The colour would compliment almost any hair colour and skin tone and if pink really isn't your thing then they also do it in black!

Dress: Boohoo.com £15
Shoes: shusole £14.99


Monday, 3 November 2014

Burgundy matte nails - Barry M review

Burgundy matte nails - Barry M review


As the matte nails craze continues I finally caved into trying the Barry M Matte Nail Paint range.

As my favourite colour of the season is burgundy I thought it was a bit of a no brainer to buy the Matte paint in the shade 'Crush'. It's a gorgeous deep burgundy colour and matches perfectly with dark lipstick!

The paint come in the standard Barry M bottle with an average sized brush but is extremely easy to apply. As the paint dries quite quickly it is important to paint each nail quickly and precisely so the paint dries with an even finish.

I would recommend this product to anyone wanting to try out Matte nails as each paint is only £3.99, so if you decide it's not for you, you haven't lost a small fortune and I would also recommend the Barry M Matte Nail Paint to any Matte nail enthusiasts out there!

I purchased this product at Superdrug for £3.99 ❤️

Sunday, 19 October 2014

O.P.I 'Mod My Day' review

O.P.I 'Mod My Day'


I have a new fav nail colour I would love to share with you guys.

As you may know I'm a massive fan of anything pink and pink nails are usually a must for me! I'm also a big fan of O.P.I nail lacquers as the colours are always bold, no washout colours that seem to need 100 coats to achieve the colour you expect, and there are so mama colours available there is one for every outfit, season and mood!

I recently purchased 'Mod My Day' by O.P.I and it's safe to say it did not disappoint!

The pastel pink/lilac shade ties in perfectly with A/W 14 pastel trends and compliments any nail shape and length ..this colour is an all round MUST HAVE! 💕

Purchased from Debenhams £11.50


Sunday, 21 September 2014

Bootea teatox final review

I have now finished my 14 day Bootea teatox and as promised, I am going to share my results with you all!

The 14 day teatox consists of a daytime tea to drink in the mornings on a daily basis and a night time tea to drink in the evenings every other day.

Daytime teatox - Chinese Oolong tea, ginger root, fennel seeds, nettle leaves, lemongrass, dandelion leaves, ginseng root and gotu kola leaves. Best left in boiling water for 3 minutes and has a light ginger and slightly floral taste.

Night time cleanse - Senna leaves, peppermint leaves, Fenugreek leaves, liquorice root, burdock root, hawthorn leaves, valerian root and psyllium seeds. Also best left in boiling water for roughly 3 minutes but the taste of the night time tea is similar to peppermint tea rather than green tea. Great news if, like myself, you are a lover of peppermint tea.

The daytime tea is perfect in the morning as it gives you a little energy boost and, as I mentioned before, helps keep you hydrated as the tea is obviously made with water! I found the tea helped speed up my metabolism while at the same time suppressed my cravings for naughty food during the day and also helped me choose healthier options for lunch as I could think with my brain and not my stomach! After a week or so I also noticed less breakouts and clearer skin.

The night time cleanse on the other hand seemed to have little effect on me. The idea is that the ingredients, mainly senna and liquorice root, are meant to aid the clearing out of your colon without getting too graphic! I have read reviews that describe the night time cleanse as a 'nightmare' but honestly unless you are eating rubbish all day every day or you have existing colon issues, I believe the night time cleanse just helps along what would happen naturally - no horror movie scenes here!

Unfortunately Bootea does not offer a 100% guarantee, so if you don't feel it agrees with you or simply don't like it you're stuck with it, which is a bit of a downside but from  my personal experience and all the happy reviews I've read I would definitely recommend the product for anyone looking to loose weight, stop bloating or just to help kick start a healthier diet.

I hope my review will help you decide whether Bootea is right for you - good luck! If you have any questions feel free to ask ❤️

Thursday, 18 September 2014

Lilac loving - ft. Boohoo & ShuSole


Hey dolls!

As I haven't done any outfit posts yet I would love to start with a favourite of mine right now I wore to my friends birthday night out on Saturday - this is the perfect combo for those girly nights out!

The dress - from Boohoo.com. As I have lilac hair at the moment I really wanted a dress to match for this special occasion and the 'Cece' plunge bandage bodycon dress fit the bill perfectly! The bandage style helps give curves in all the right places and the deep plunge shows off everything else. Even if your chest isn't as impressive as you would like it to be, contouring with a little bit of bronzer can be the answer to making the most of your assets. This perfect party girl dress - £15

The shoes - from shusole.co.uk. I have a huge crush on cleated heels right now as I've always preferred chunky shoes to painfully thin stilettos so these black beauties from Shusole are like a dream come true! They come in range on colours but I would suggest buying a size smaller as they come up a little bigger. A total steal at £20!

The hair - see my previous post as to how I get my hair lilac!

Feel free to ask questions below 💜 PEACE ✌️

Wednesday, 10 September 2014

Bootea detox - Day 9!

Just a quick update of my Bootea teatox girls.

Day 9 of my teatox and I'm happy to report I've lost 4lbs already!
That's even after a few cheeky slices of pizza over the weekend!

Of course, the teatox does require a pretty clean diet to have the best effect so I wouldn't suggest any cheat days to anyone looking to try this detox in order to loose weight.

As for the other effects of the Bootea teatox I've found for me personally it has helped clear my skin quite dramatically and also stopped bloating after I eat, which was the main reason I turned to Bootea.

Another huge side effect (in a good way) would be the reduction of cravings In between meals - I find working in an office at a desk all day sets off the killer cravings for anything that's full of sugar and covered in chocolate which is bad news for any diet! The morning teas help to suppress any cravings and stress eating during the day which can be a big factor in weight gain.

Watch this space for my final update and review ❤️

Sunday, 7 September 2014

How to get pastel coloured hair - Lilac

So I've been asked quite a few times now as to how and what I have used to make my hair lilac so I thought I would do a quick post to answer everyone's questions!

As much as I hate to admit it, my half isn't in the greatest condition as I have been bleaching it for the passed two years so when I decided I wanted to add a little colour to my hair I chose a product that would not damage if further.

I chose to use La Riche Directions temporary hair dye in Lilac when colouring my hair as the pigment is bright and can easily be lightened if you find the colour to dark on it's own.

As my hair is so long to achieve the perfect shade of lilac I mix roughly half a teaspoon (yes, just half a teaspoon, that's how good Directions is!) with roughly a litre of white conditioner - it doesn't have to be expensive, I use the white coconut conditioner from Tesco which is just 80p a bottle, otherwise colouring can become very expensive!

I mix the colour and conditioner in a large bowl, preferably a plastic bowl you don't mind staining, and apply with a large hair dye brush.

It's usually easier if you section your hair to get maximum coverage and start applying the dye mix from the bottom upwards using the brush and I would also advise using rubber gloves as it's a messy job - if you can get someone to check you've covered every section, or even better if you can get someone else to do it for you! After all ..no one wants streaky hair!

The directions colours tend to work better on bleached or light blonde hair, especially when trying to achieve lighter colours so this technique may not work for everyone but I hope I've answered your questions 💜

Feel free to comment any questions 💜


Wednesday, 3 September 2014

Bootea review - day four!

Day 4 of the Bootea detox!

After completing the first few days of my teatox so far so good – I had heard the tea tasted horrible as the teabags each contain pretty much everything but the kitchen sink, but surprisingly they are quite light and refreshing with a slightly florally taste with a hint of ginger. Normally I am fussy with food and drink but if I can stomach these bad boys I would say any girl determined to detox and loose weight will manage these easily.

One of the worst things about these online run teatox and diet supplements businesses is the rumours can sometimes over power the truth of how well a product actually works. I actually saw a comment on Instagram saying the Bootea daytime tea’s tasted like dirty bathwater (eww!) which really is a complete over-exaggeration and should be ignored!

After just 4 days I feel less bloated after eating and because it helps you to drink more water than you normally would, I feel more awake than usual.. Even on a Thursday morning.

I'll keep you guys posted and fill you in on the 'dreaded' night time tea tox in my next post ❤️

Monday, 1 September 2014

Bootea review - Day one

Morning!

So today is day one of my 'teatox' diet.

I have been following some of these teatox companies on social media sites for quite sometime now and there is always a debate to whether these 'cleansing' teatox's actually work - so I have taken the plunge to try one of these detox regimes and post an honest review over the course of the diet.

My weapon of choice is the Bootea 14 day teatox as it is the most commonly used tea diet and isn't overly expensive like most weightless programmes (£19.99 for the full 14 day course) which consists of 14 day tea bags and 7 night tea bags.

The idea is to have one daytime tea bag every morning for 2 weeks to aid digestion and prevent bloating when used as part of a balanced diet  - each tea bag contains a mix of ginger, fennel seeds, dandelion and nettle leaves leaves as well as a mixture of other herbs great for detoxing.

Now for the interesting part ...the night time detox. To my surprise it actually contains laxatives, which can be a terrifying thought at first but after reading a little about it online I learnt that these laxatives are gentle and mild to help flush away all toxins. No horror movie scenes here!

I will be posting a day by day review of my 14 day teatox - wish me luck & watch this space! ❤️

Purchase from www.bootea.com


Friday, 22 August 2014

Sexy Mother Pucker Review

Every girl dreams of the perfect pout ..but few are daring enough to inject the lethal cocktail of chemicals into there lips, that are hit and miss at the best of times.

We ask ourselves, what can I do to get perfect pout?

So there are usually two common way to achieve this picture perfect pout - the first being the old layers of lip liner and gloss trick and the second being the miracle that is plumping lipgloss!

Plumping gloss is usually the easier option for girls on the go, being easy to apply and reapply in a few seconds, but which 'plumping' glosses really work?

I have had my eye on the Soap and Glory Sexy Mother Pucker for quite some time now but being a little pricey I had been hesitant purchase it in case it was a complete failure like other brands I have tried but honestly it may be one of best beauty products I've ever bought!

I chose the shade 'Candy Gloss' as it's a pale pink shimmer (my fav) and can be used on it's own for daily wear or over lipstick for an red carpet worthy evening look. I pair it with the MAC matte lipstick In the shade 'snob' but I will do a separate post for that one.

The Sexy Mother Pucker gloss can be applied like a normal stick gloss but the effects become clear quite quickly - within 30 seconds my lips were tingly and were noticeably plumper. The tingle is quite intense, which can be a little alarming at first but after roughly 10 minutes the tingle sensation dies done leaving you with the picture perfect pout you've always dreamed of.

I know some girls are put off by the 'tingle' but I beg all you girls that are worried to be persistent for 10 short minutes to see for yourselves the amazing effects off this lipgloss and I can promise you will never use a normal gloss again!

The Soap and Glory Sexy Mother Pucker plumping gloss can be purchased in makeup stores in both the UK and the US and is also available online.

Thank you for reading and please leave comments and share! Much appreciated ❤️


Sexy Mother Pucker in Candy Gloss

Before using the plumping gloss 

10 minutes after use 


Tuesday, 19 August 2014

Beauty Buys of America

Hi everyone! Sorry it's been a while, packing for a holiday really does take up all your time!

But .. I'm finally here, across the pond in Florida!

Even though I've only been here a few days I'm already drooling over all makeup brands out here that we don't have at home like Covergirl, Wet'n'Wild and my favourite NYX.

So I thought I would do a little blog on my favourite American beauty buys so far!

First up is the Wet'n'Wild 5x megaplump mascara at the 'value for money' end of the beauty spectrum - being so well priced (at 3.97$ to be exact) I wasn't sure what to expect, I've always had good experiences when using the Wet'n'Wild brand so decided to put this mascara to the test!
I can safely say it did not disappoint, especially for a cheaper drugstore brand. The brush is a perfect thickness for capturing both long and short lashes without leaving clumps, keeping the lashes separated while adding extra length and volume. Even when using the mascara on my bottom lashes where things tend to get messy, it worked like a dream.
I would suggest using two coats as this adds to the length and makes the lashes look extra dark without looking extra clumpy! I would recommend this product to all of my blog readers.

The second product I would love to share with you guys is the NYX Set it Don't Fret It matte finishing powder.
I Love NYX products but the can be difficult to get your hands on in the UK with some products only being available in the US so I jumped at the chance of a few cheeky NYX purchases while in Target of all places!
In this post I would like to share my review on the matte finishing powder - my makeup daily makeup routine usually consists of a little concealer, liquid foundation, finishing powder to set the concealer and foundation then blush/bronzer and to finish -mascara and sometimes eyeliner if I have the time!
I have always had trouble finding a finishing powder that will cover the foundation without making my face look orange! I have tried what seems like hundreds of different powders, all of which have the same outcome - an awful orange face!
I've read some reviews on the NYX powder and thought I should give it a go as it is praised all over the internet.
The product is a superfine translucent powder that can be applied easily with powder/kabuki brush - tip a little powder into the product lid to make sure you don't end up a mountain of powder going to waste, then dab the brush lightly into the powder in the lid, you only want a tiny amount on the brush to avoid the powder caking over your makeup or flicking the powder all over the place (I learnt that the hard way) then softly brush the powder over your face, avoid applying pressure as this can brush away foundation and give it a streaky look.

I would suggest this powder is more something you would use as well as foundation/concealer, as coverage is quite minimal and will not cover any blemishes, although if you're lucky enough to have perfectly clear skin and are just looking for a light powder to reduce any shiny patches then this product is also ideal.
So if you're tired of orange, cakey powders I would definitely recommend the NYX Set It Don't Fret It Matte powder - available in various stores in the US and available online for the UK and other counties.

I hope you enjoyed my little reviews of beauty products from across the pond! Comment below ❤️

Wet'n'Wild Megaplump Mascara 


NYX Set It & Don't Fret It Matte Finishing Powder


Here I have used both products :)